Material Design is a hot topic nowadays. There are many who have heard of it but not so many used its guidelines in their work. It looks sexy and stuff but how do you inject all that beauty into your website? This article will explain how to apply Material Design look and feel to forms on your existing web pages using basic knowledge of JavaScript and a 3rd-party library called Material Design Lite.

Beautify your Form with Material Design
“Once upon a time there was an Ugly Form. Every day it would look at beautiful forms residing peacefully on the endless pastures of the Internet and sigh with envy.
‘Don’t I deserve my share of HTML happiness?’ the Form thought. ‘Why do users shriek in disgust every time they see me? Why do they look terrified (and sometimes cry) when filling out my fields? And why the hell do they wash their hands after clicking my flabby lifeless buttons?””
Every time I would tell this amazing fairytale to my kids before their bedtime, they’d ask me: “Daddy, but why can’t the Ugly Form be happy too? Sure, it looks like HTML got diarrhea and pooped out a pile of colorless Lego bricks, but maybe there’s a chance for it in our cruel world?”
And one day I finally decided to play the Fairy Godmother to the Ugly Form and help it turn into the Kim Kardashian of forms overnight (with zero plastic surgery expenses, mind you). After some thorough research I picked Material Design Lite (MDL) as my magic wand and that’s the only thing you will need, too.
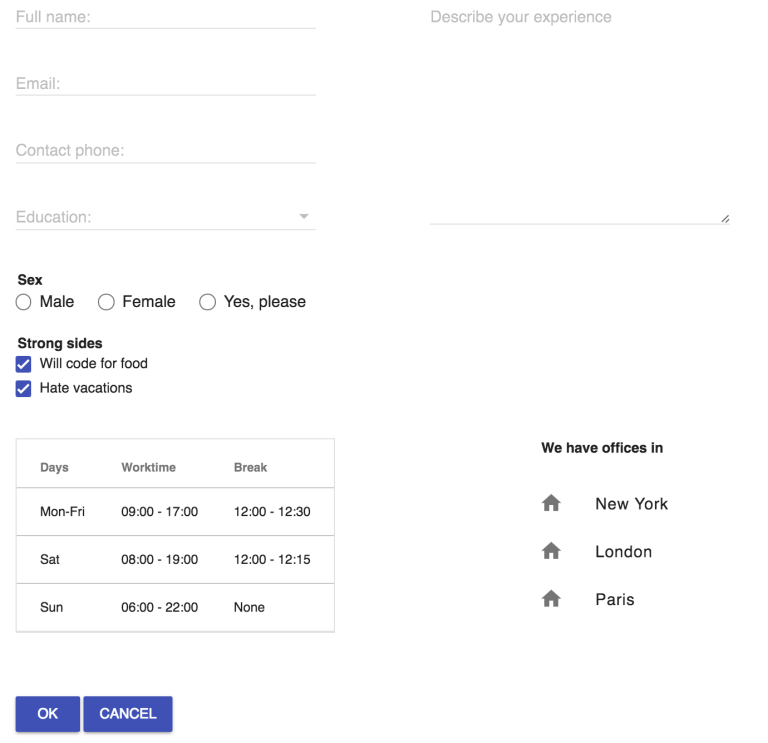
I'll get a bit ahead of myself and show you right away what will be the end result of what we're going to do in this article.

Looks modern and professional, right? But it hasn't always looked like that. In fact, I wouldn't dare to show you how this form initially looked if it wasn't for the sake of this article.
Anyway, let's get to the process. To begin with, we need a web page with an ugly form. I assume you already have it, but if not - just create one and experiment with it. For this article I created a job application form for an imaginary company hiring IT specialists, see below:
The page has some basic styling, mostly to add some padding to controls in the form, but nothing fancy. It’s totally fine if your page is already using some CSS classes. But be aware that they may cause conflicts with the MDL stylesheets, so you might want to tweak the code and remove the old classes (you can do that dynamically using the Javascript code below, too).
When you open that page in a browser, it should look something like this:
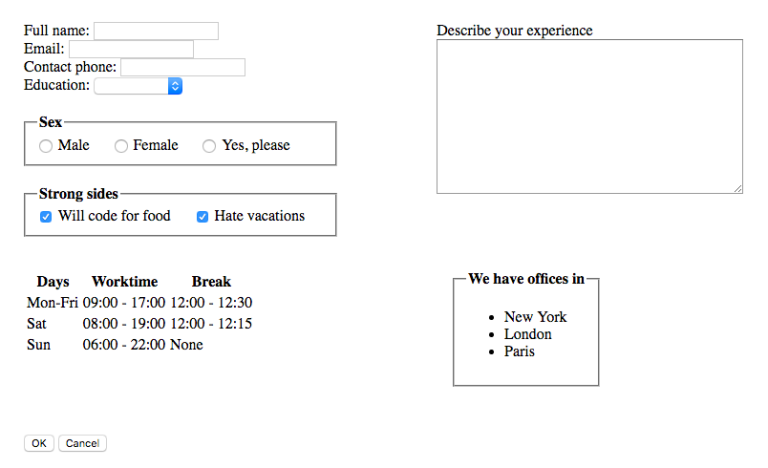
This form has some basic text input fields, a textarea, a table, several fieldsets with checkboxes, radio buttons and a list of bullet items. And the buttons, of course.
When I saw the ugly creature I just built with my own two hands I was like (in heavy Austrian accent): “YOU ARE ONE UGLY MOTHE**UCKER…”.
Without further ado, let’s rush to the uneasy task of turning this freak of HTML nature into something worth showing to your boss before asking for a pay raise.
First thing we need to do is add external references to the MDL’s js-library and CSS inside the <head> section of your webpage:
<!-- MDL references -->

<link rel="stylesheet" href="https://fonts.googleapis.com/icon?family=Material+Icons">

<link rel="stylesheet" href=“https://code.getmdl.io/1.1.3/material.indigo-pink.min.css">

<link rel="stylesheet" href=“https://rawgit.com/MEYVN-digital/mdl-selectfield/master/mdl-selectfield.min.css">

<script defer src="https://code.getmdl.io/1.1.3/material.min.js"></script>

<script defer src="https://rawgit.com/MEYVN-digital/mdl-selectfield/master/mdl-selectfield.min.js"></script>
Alternatively, you can download the MDL package, host it on your own server and reference that instead.
Note name of the CSS file: material.indigo-pink.min.css. The “indigo-pink” part defines primary and accent colors your controls will be using. There are plenty of colors to chose from, but I picked “indigo” because it sounds mysterious and “pink” because everything beautiful is pink (for example, unicorns and €50 bills).
Now let’s create some magic. We need to write javascript code that will loop through controls on the page and apply MDL styles to them. Copy the piece of the code below and paste it inside the <head> of your page, right after the references section:
Look at the code above.
There’s a method called materializeControls which will be called in window’s onload event handler, when the DOM is in place. materializeControls calls another method called materializeTextInputs, which loops through all text inputs and textareas on the page and assigns required MDL CSS classes to them, their labels and their parent divs.
NB! In order for Material guidelines to be entirely fulfilled, each input control must be properly wrapped inside a parent div along with its label. The code will not fail if it’s not the case but "you may not be 100% satisfied with the result", as my hairdresser used to say before I had given up getting haircuts.
When you refresh the page after adding this piece of code, you will see some amazing transitions:
Note how the first three text inputs on the left and the textarea on the right are now rendered according to the Material guidelines with more air around them, labels inside placeholders and nice on-focus highlighting.
By now you are supposed to be completely hooked, like a housewife addicted to Candy Crush, and cry for more.
We will stick to the same algorithm for other controls as well.
Dropdowns
Add a new method called materializeSelects that will basically use the same formula as materializeTextInputs - going through select controls and applying MDL styles to them.
The only manual thing we will have to do here is add class “mdl-selectfield—floating-label” to the wrapping div of the select element. This will make sure that a dropdown’s label is shown above the control once a value is selected.
<div class="mdl-selectfield--floating-label">

 <label>Education:</label>

 <select name="education">

 …

 </select>

</div>
Refresh the page to get another injection of pure magic:
Radio buttons
The code for radio buttons is a bit different because they are wrapped inside their labels (so that a mouse click on a label would select the button), but the principle is the same. Note how we apply “mdl-js-ripple-effect” class to radio buttons’ labels to achieve, well, ripple effect. You don’t have to do that but it adds an extra cool touch to user interaction with the elements.

Checkboxes
Exactly the same principle here as with radio buttons (yes, you can use the same method with arguments):
Tables
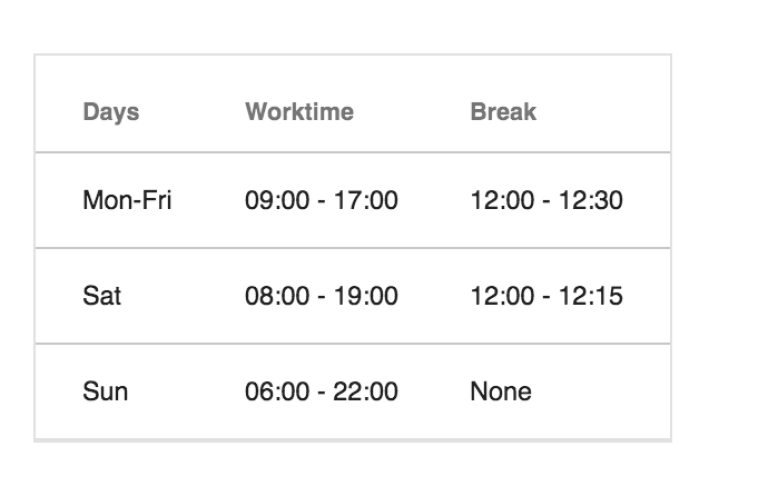
Lists
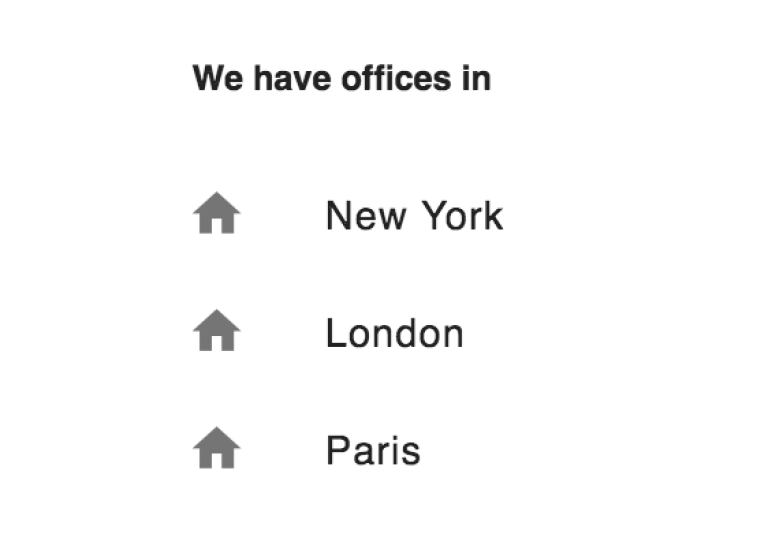
For lists (<ul> element) we will perform a little trick. To liven up the list of offices we will replace the bullet character with a “home” icon from the huge library of Material icons.
Note how when browsing through <li> elements inside each <ul> we inject an icon before the list item’s text and then wrap both of them with a <span>:
liEl.innerHTML = "<span class='mdl-list__item-primary-content'>" +

                  "<i class='material-icons mdl-list__item-icon'>home</i>" +

                  liEl.innerText + "</span>";
In order to be able to use Material icons on your page, you need to include a reference to their font family from the Google site, but we have already done it:
<link rel="stylesheet" href="https://fonts.googleapis.com/icon?family=Material+Icons">After that you can render any icon from the Material library like this (we used “home” as an icon Id):
<i class=“material-icons"><icon Id></i>And that’s how our new list will look now:
Buttons
There are many different styles and effects that can be applied to buttons; you can read about it on the MDL site. We used the same “mdl-js-ripple-effect” class to get the ripple effect whenever a button is clicked and “mdl-button—colored" class to have them colored in the primary color of our selected scheme (remember indigo?). If you replace the latter with “mdl-button—accent” the buttons will be in accent color (in our case - pink).

Conclusion
Believe it or not, but we’re done. Using almost no CSS and only basic knowledge of Javascript, we turned our ugly duckling into a beautiful indigo-pink-ish swan. We could have refactored our Javascript code a little to have just one pass through all elements on the page and then dispatch processing to other methods based on element type, which would of course be much better performance-wise, but here I tried to visualize “converting” controls type by type.
And this is how our form looks after our changes:
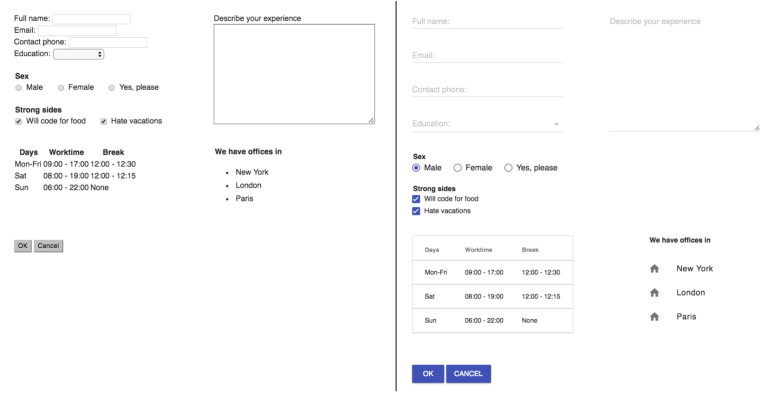
For even better effect I will show you the same form “before” and “after”, side by side:
And here's the final source code of our now beautiful form:
I hope that this article will help you to take your first steps into the beautiful land of Material Design. It’s not as scary or complicated as you may think and along the way you might even help a page or two become better versions of themselves without giving it too much effort. After all, each of us had our encounter with an ugly form even if we chose to keep it a secret.